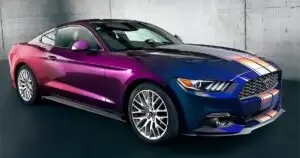
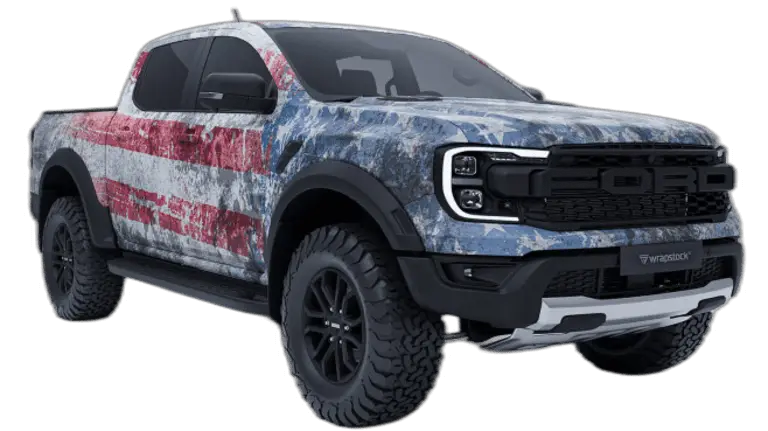
Understanding Car Wrapping
Car wrapping involves applying a large vinyl decal or graphic over the exterior of a vehicle. This process can change the car’s appearance without a permanent paint job and can be removed later if desired. Car wrapping can range from simple color changes to complex designs and advertisements.
Common Car Wrapping Challenges
While car wrapping might seem straightforward, there are several challenges that can arise during the process.
- Surface Preparation: Any dirt, grease, or imperfections on the car’s surface can affect the vinyl’s adhesion and final appearance.
- Precision Cutting: Cutting the vinyl to fit the contours of the car without damaging the paint requires skill and precision.
- Air Bubbles: Improper application can lead to air bubbles under the vinyl, which can ruin the wrap’s appearance and durability.
- Complex Curves and Contours: Cars have various shapes and curves, making it difficult to apply the vinyl smoothly without wrinkles or creases.
Even with careful attention to detail, these challenges can lead to a less-than-perfect wrap. For those unfamiliar with the process, it can be frustrating and time-consuming to achieve professional-looking results.
Steps for Car Wrapping
1. Preparing the Vehicle
Before applying the wrap, the car must be thoroughly cleaned and prepped to ensure the vinyl adheres properly.
- Deep Cleaning: Wash the car thoroughly to remove all dirt, grease, and debris.
- Surface Inspection: Inspect the surface for scratches, dents, or rust, as these imperfections can affect the vinyl’s appearance.
Skipping any of these steps can lead to poor adhesion and a less durable wrap. Even minor contaminants can cause bubbles and peeling, compromising the wrap’s longevity.
2. Measuring and Cutting the Vinyl
Once the car is clean and prepped, the next step is to measure and cut the vinyl to fit the vehicle’s specific dimensions.
- Accurate Measurements: Measure each section of the car carefully to avoid wasting material.
- Cutting the Vinyl: Use sharp blades and cutting tools to ensure clean, precise edges.
- Dry Fitting: Place the vinyl on the car without removing the backing to check the fit before final application.
Precision is key here, as any mistakes can lead to costly re-dos and wasted materials. Professionals have the experience to get it right the first time, saving you both time and money.
3. Applying the Vinyl Wrap
The actual application of the vinyl is where the most skill is required.
Handling Flat Surfaces
Applying vinyl to flat areas might seem simple, but it requires a steady hand to avoid bubbles and wrinkles.
- Peel and Stick: Start by peeling a small section of the backing and carefully stick the vinyl to the car.
- Squeegee Out Bubbles: Use a squeegee to smooth out any air bubbles as you apply the vinyl.
- Heat to Set: Use a heat gun to make the vinyl more pliable and ensure it conforms to the car’s surface.
Even though flat surfaces are easier, any mistake can lead to imperfections that are difficult to fix. Professionals are trained to apply the vinyl flawlessly, ensuring a smooth, bubble-free finish.
Wrapping Curves and Contours
Applying vinyl to curved surfaces and complex shapes is much more challenging and requires advanced techniques.
- Stretching the Vinyl: Gently stretch the vinyl to fit the contours of the car without tearing it.
- Using Heat: Apply heat to make the vinyl more flexible and easier to mold to the car’s curves.
- Trimming Excess: Carefully trim away any excess vinyl, making sure not to cut into the car’s paint.
These steps require a high level of expertise, as improper handling can lead to a distorted or uneven finish. Professional installers know how to navigate these tricky areas to ensure the wrap looks seamless.
Finishing Touches
After the main application, the final steps involve sealing and inspecting the wrap.
- Sealing Edges: Apply heat and pressure to seal the edges of the vinyl to prevent peeling.
- Final Inspection: Check the entire vehicle for any bubbles, wrinkles, or imperfections.
- Post-Application Care: Advise the car owner on how to care for the wrap to maximize its lifespan.
These finishing steps are crucial to ensure the wrap is durable and looks professional. A DIY job often lacks these meticulous details, which can result in a subpar outcome.
Maintaining Your Car Wrap
Proper maintenance is essential to keep your car wrap looking new and to extend its lifespan.
Regular Cleaning
Cleaning your wrapped car requires a bit more care than a standard paint job.
- Use Gentle Products: Avoid abrasive cleaners and use a soft cloth or sponge to clean the wrap.
- Hand Wash: It’s best to hand wash your car rather than using automated car washes, which can damage the vinyl.
Neglecting proper cleaning can lead to premature wear and tear on the vinyl. Regular maintenance keeps the wrap vibrant and prolongs its life.
Avoiding Harsh Conditions
Exposure to extreme weather and other environmental factors can shorten the lifespan of your wrap.
- Sun Protection: Park in shaded areas or use a car cover to protect the wrap from UV damage.
- Minimize Exposure to Chemicals: Avoid spilling gasoline, oil, or other chemicals on the wrap as they can cause discoloration.
Taking these precautions helps maintain the wrap’s appearance and prevents unnecessary damage.
Professional Touch-ups
Even with the best care, your wrap may eventually need some touch-ups or repairs.
- Consult a Professional: If you notice any lifting, peeling, or damage, it’s best to consult a professional for repairs.
- Regular Inspections: Periodically inspect your wrap for any signs of wear and tear.
When it comes to repairs and touch-ups, trusting a professional ensures that the job is done right. They have the tools and expertise to seamlessly fix any issues, keeping your car looking its best.